This post explains
version 1.0 beta of the Magical Sheep userscript for the free
Firefox browser (also works with Firefox 1.5.0.6) with the
Greasemonkey extension - updated 20 August 2006 to work with
Blogger Beta (reviewed in
this post).
It's a tool designed to help
Blogger users add code for the
Technorati tags of choice to the end of their blog post easily and quickly (
what are Technorati tags?), with various extra features.
(Note: this post was heavily rewritten in April 2006 to explain from scratch all the features of version 1.0 beta of this script, which
Kirk has substantially improved, all power to him! A summary of the latest changes he's made plus technical details is at the
end of this post.)
How to install Greasemonkey and other Firefox extensions. For those not familiar with Greasemonkey - it's an extension for the free Firefox browser (). You have to first go to the Greasemonkey site and install the Greasemonkey extension (Firefox users should be familiar with how to install extensions - click the installation link e.g. the "Install Greasemonkey" link. If nothing happens and you see, just below your Firefox tab titles, a message in horizontal bar that "To protect your computer, Firefox prevented this site (greasemonkey.mozdev.org) from installing software on your computer", then you should click "Edit Options" at the end of that line, then "Allow" and "OK"/index.html"Close" to allow that site to install software, then click the Greasemonkey or other extension link again, give it a few seconds then click "Install now". Close and re-launch Firefox.)
How to install a user script. Greasemonkey won't do anything without a user script. To install a script (which is a text file whose extension ends with ".user.js"), you click on the link to the script. You should get a popup box - wait a few seconds if necessary for the "Install" button to stop being greyed out, then click Install to install it. [Updated for newer versions. For older versions: When you're on that page (which looks like just a bunch of text), click the Install button at the top right, or in your Firefox Tools menu choose Install This User Script. Alternatively you can just rightclick on the link to the script and choose Install This User Script].
Beware though, not all scripts will be innocent - some could wreak havoc if malicious. Only install if you trust the originator of the script. You can use the "Show Script Source" button in the popup to check the script's content before installing it (or for newer versions of Greasemonkey rightclick the link to get the View User Script Source option), if you understand Javascript/Greasemonkey.
How to update the Magical Sheep script for Blogger Beta, now known as New Blogger. The downloadable script has been updated already but if you're already using the script and don't want to download the updated version (it'll preserve your settings), here's how to do it the manual way.
IMPORTANT: if you are already using the Magical Sheep script, this version is
not compatible with previous versions of the script so you MUST uninstall it first from Firefox - Tools, Manage User Scripts, click on the script name (Technorati Multiple Word Tags for Blogger),
FIRST tick "Also uninstall associated preferences" THEN click the Uninstall button. Then install the new script as above. You will then have to re-enter your "MeTags" and own choice of separator, but that should only take a few seconds.
Get the userscript (version 1.0 beta) from
Userscripts.org (UPDATED 17 Dec 2007 to fix a Blogger Post Editor change on 14 Dec which broke the script). If that site is down or slow, try rightclicking on the link for the following alternative location and then choosing "Install This User Script" (that's important - if you leftclick it, you'll have to save it to your computer then open the script from there, which takes longer; this is because of the way
Google Pages handles Javascript files hosted there, unfortunately):
Third update of Jan 2007. There seems to be an issue with Technorati's tag pages (yes, another one! or rather, with the way their tag searching works) and multiple word tags don't work quite as expected. In brief, you might think that if you insert the tag "consuming experience", clicking on that tag should bring people to the tag page listing all posts with the tag "consuming experience". In reality, it takes them to all posts which have a tag (whether single or multi-word) with "consuming" in the tag, AND which have a tag with the word "experience" in it.
Not the same thing. And they might get some irrelevant results because of that.
However, if you put quotes round your multiword tags in the href bit to make it better for users who click on the tag links, your post won't appear on Technorati or other search engines' tag pages at all. See
this post. So don't do it. But do lobby Technorati to tweak how their searching works!
Summary
What this script does is add a new section to the bottom of the posting box in Blogger, in both Compose and Edit HTML tabs. You'll see a box with the green Technorati icon, for entering tags, a green Append Tags button and a Tag Settings and Options link:
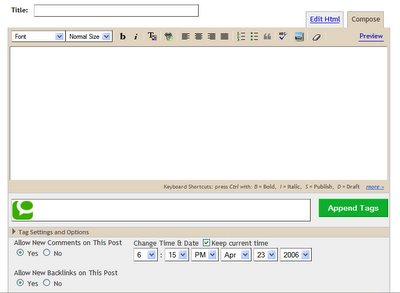 UPDATE Jan 08: the script has further been tweaked to make sure the Post Options section stays open permanently even when you switch between Compose and Edit HTML modes, because Blogger changed things so it closes if you switch modes. Links in this post are to the updated version.
All you have to do is to enter the tags of your choice in the Tags box, separating different tags using a comma (multiple word tags, i.e. tags consisting of more than one word, are fine) - for example Blogging, blogs, feed reader, Magical Sheep, Technorati:
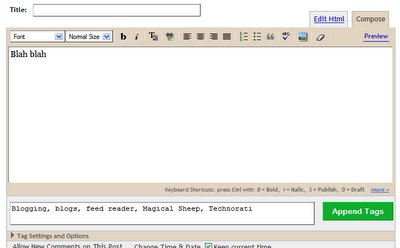
Click the green Append Tags button, and the code for the tags will be added to the end of your blog post:
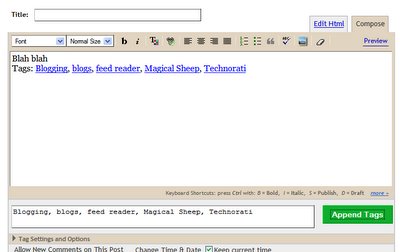
Here's what the code looks like if you switch to the Edit HTML tab:
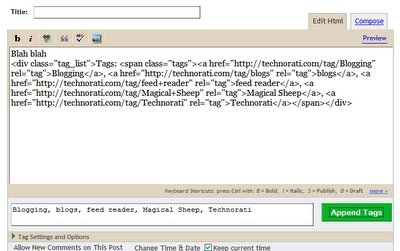
(Note that there are
problems with certain correctly tagged posts not appearing on Technorati's tag pages, but that is a different issue and not related to this script.)
How to edit tags
If later while you're writing or editing your post you want to change or delete your tags or add more tags, all you have to do is edit the tags in the tag box and click the green Append Tags button and it will update the code in the blog post - you
don't have to edit the code in the post editor box.
(This version 1.0 fixes a bug that stopped this from working before, thanks to
Clamatius for the spot. I should mention that the bug was in the original script which Kirk adapted to provide multiple word tag support, he didn't introduce it! It's just that no one had noticed or pointed it out before...)
Settings and options
This version of the tool has some extra features and options some people may find useful. To access them, click on Tag Settings and Options (under the Tags box), and you'll see this:
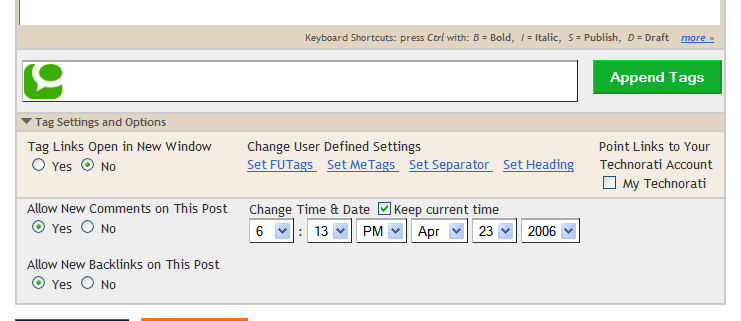
Tag Links Open in New Window
Select Yes if you want the resulting Technorati tag page, which appears whenever a visitor to your blog clicks on a tag in your tag list, to open in a new browser window rather than the same window.
You'll see there are now four items under Change User Defined Settings: "Set Me Tags", "Set Separator", and "Set Heading".
User Defined Settings - Frequently Used Tags (FUTags)
FUTags are just an option to let you add certain tags that you used frequently in your blog (e.g. if your blog is about music then you'd use "music" a lot) without having to type the tag in full, just by clicking on the tag you want, from a list you set up.
To produce your list of frequently used tags, click "Set FUTags" and you'll get a box in which to enter your frequently-used tags - you can enter them in any order you like, separating different tags using a comma:
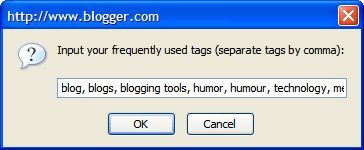
Click OK and you'll get a confirmation of your FUTags:

Click OK again and the list of FUTags you entered will appear under the tag input box, magically rearranged into alphabetical order, as clickable links:

To use FUTags just click on the tags you want to add from the list, and they will be added to the tag box (in this case I clicked on humor and media):
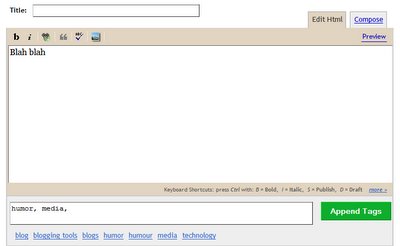
Then click the green Append Tags button, and the appropriate code will be added to the
end of your blog post box in a form which Technorati will recognise and pick up. In the Compose tab here's what it looks like:
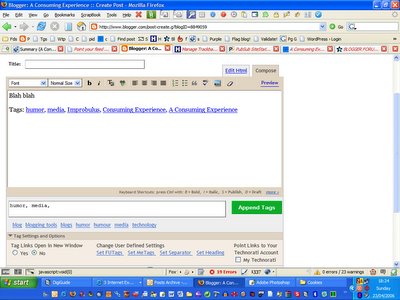
And here's what the added code will look like in the Edit tab:
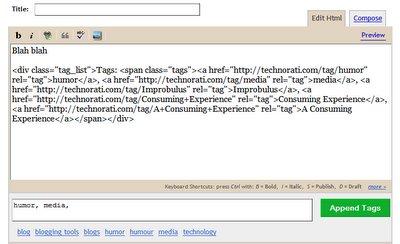
(Wondering why there are extra tags (Improbulus, Consuming Experience, A Consuming Experience) appearing at the end of the posting box, even though they weren't added to the Tags box manually and aren't in the FUtags list? They're my automatic "metags". I'll explain it all in a minute.)
To edit your FUtags, just click Set FUtags again, and the box with your list of FUTags will come up:
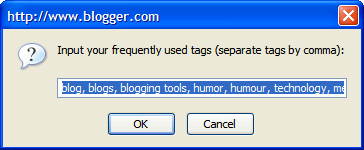
Click in the input line to unhighlight it (otherwise you might accidentally overwrite all your FUtags when you type something), then change a tag, delete a tag or add new tags etc as you wish.
Note that in this box the tags will appear
in the order you originally typed them (which won't necessarily be alphabetical), even though when you click OK and then OK again to confirm, the list of FUTags added under the tags box will be shown in alphabetical order. So you don't really have to input your FUTags in alphabetical order. Nevertheless, for ease of future editing I'd recommend that both when you first add your FUTags and when you edit them, you put them in alphabetical order in the popup box so that you can find the tags you want to edit more easily when you need to.
Set MeTags - add meblogging tags
Click "Set MeTags" and you can then enter and OK specific tags which will always be magically appended to each of your posts automatically from then on, without your having to type the tags into the tag box or enter the code for those "metags" into your posts manually:
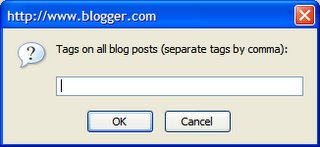 What are MeTags?
 MeTags are just unique tags you've decided on for yourself or your particular blog (
more on "meblogging") - e.g. I tag all my posts "Improbulus" and also "Consuming Experience"; if you're
ChickyBabe you might tag all your posts "ChickyBabe":
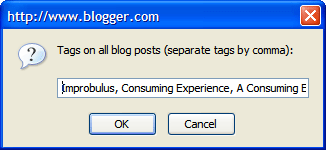 Several MeTags.
 As you can see, you can have more than one metag - just separate them with a comma. This also works where the tag consists of more than one word, e.g. A Consuming Experience, Consuming Experience. Setting "Me Tags" will save you typing your "me tags" afresh at the end of your tags each time.
Editing MeTags. To get rid of or edit a "meblogging tag" just click Set MeTags again and edit what appears in the popup box (remembering to click in the input line first to unhighlight it if you don't intend to overwrite the lot).
What's the difference between MeTags and FUTags? All your MeTags are added automatically to the end of the post when you click Append Tags, without your having to type anything. A FUTag is only added to a particular post if you click on the name of the tag from your FUTag list, and you can add as few or as many as you like. FUTags are just to save on typing where you have tags you use often, but not necessarily in every single post.
MeTags or Your Technorati Account? You might decide not to use me tags, but instead to point only to tags under your Technorati account (covered below) - but equally you can use both if you want to.
Set Separator - customise your displayed separator
By default, the separator symbol displayed in the list of tags at the end of your post is a comma. In other words, each tag is separated from the next by a comma e.g. Improbulus, Magical Sheep, A Consuming Experience. If you want to change that separator to something else e.g. a slash, click "Set Separator":
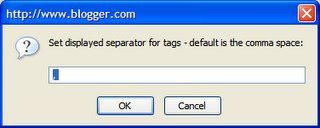
Then change it e.g. to space slash (/_/index.html) and hit OK. Note that the "Set Separator" button enables you to set the VISUAL separator that's displayed in your list of tags - NOT what you type when you're entering your tags in the Tags box.
You must still separate your tags with commas when you enter them. But if you want them to
display e.g. with a slash ("/index.html") symbol instead, then you can do that with the Set Separator button.
You may need to add spaces before or after your chosen symbol as necessary (if you experiment but then decide to go back to a comma you may need add a space before the comma in the box - just try it, you can click Append tags a bunch of times with different separators and spacings to see the different results).
Set Heading
By default the tags list is headed or labelled "Tags:".
If you want to change that to something else, like "Technorati Tags:", click "Set Heading":
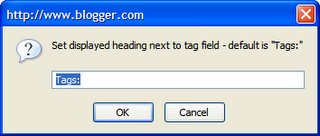
Then change the label (don't forget to include the colon or other separator if you want it in), and OK it. You could even head it "Categories:", especially if you use the feature described below to point links only to tagged posts from your own blogs.
Point Links to Your Technorati Account
This option, if checked, means that when someone clicks on a tag in your post, they will be taken to a page showing only posts from your own blogs bearing that tag.
To set this, tick the "My Technorati" box and you'll see a popup:
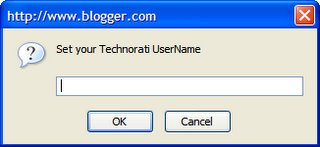
Enter your Technorati username in the popup (e.g. mine is Improbulus) and OK. Thereafter, the Technorati tag page which opens when a user clicks a tag in your tag list will, instead of listing
all blog posts with that tag, list
only posts from
your blogs which have that tag. (They must be blogs that you've claimed with Technorati, so this only works if you've
signed up with Technorati and claimed the blogs concerned - see
this if you have problems claiming your blog. For techie details on how this feature works, see the
history.)
This option offers one possible way to have a categories page (though as a separate Webpage on Technorati, rather than as part of your site), listing all the posts from your blogs which bear a particular tag. That page will even show your old tagged posts.
However if someone clicks a tag link from a
previously-tagged post which doesn't use this new feature, they will see the Technorati page for that tag for
all users not just you - in other words, this new feature of the script won't rewrite tags from old posts for you. It will only work in new posts written and tagged after you've activated this new "point links" option.
Also, it's a
known problem that some properly-tagged posts just don't show up on Technorati's tag pages, so those will be missed out of the category listing if you use on this method for your blog categories. In other words, it's not the most reliable way to introduce categories for your Blogger blog.
Styling the look of your tags
For those familiar with CSS, the div for the tags section is given the class "tag_list" (with the tags themselves given the class "tags"). You can therefore style them anyway you like to suit your preferences, e.g. tweak text size, change the colour to match the look of your blog, etc.
If you're less familiar with CSS, examples are below - just copy and paste the code given to the head section of your blog template (i.e. between where it says <head> and </head>), just before the </style> line, then save it and republish.
To make tag text smaller
.tag_list {
font-size:0.8em;
}
(for an even smaller size, you can reduce the 0.8 e.g. to 0.5, etc.)
To display a horizontal line before the tags
If you want a demarcating horizontal line above the tags to separate them from the main part of your post:
.tag_list {
border-top:1px solid #ccc;
}
To make tags invisible
From time to time I get questions about how to make the tags invisible. For all sorts of reasons, that's probably not a good idea e.g. it probably goes against the purpose of tags.
Kevin Marks of
Technorati thinks it doesn't make sense, and more to the point many believe that if you try to make your tags invisible, Technorati and other search engines won't like it and may decide not to index your posts. While
leaving out the link text worked once upon a time, that doesn't mean it will always work - I wouldn't be surprised if Technorati for one tweak things to penalise those who leave out link text for tags by refusing to index their posts properly, if they haven't already.
Nevertheless if you really want to try invisible tags (and on your own head be it!), the best way to increase your chances of having them indexed is probably to have them there on the page, but
just not displayed (and who knows whether the search engines would want to penalise that sort of thing too). In the case of this Magical Sheep tag creator, you can do that by copy/pasting this code to your template again in the head section just before the </style> line, then save and republish:
.tag_list {
display:none;
}
See further
my previous post about styling the tag text etc. For some more discussion on invisible tags yes or no, see the comments to
this post.
History
Updated April 2006 - version 1.0 beta
If upgrading - IMPORTANT - this version is
not compatible with previous versions of this script. if you have an existing version of this script, you MUST first
uninstall it before installing this version. You may then have to re-enter your "MeTags" and own choice of separator (although if you're lucky they may be preserved if you've been using a previous version of this script), but that should only take a few seconds.
Bugfix:Editing tags - after tags have initially been added, deleting a tag or adding a tag to the tag box (and clicking Append) now inserts it or deletes it from the main post box properly. (This bug was in the original script which Kirk adapted and expanded, so don't blame him for it! The script
should have been doing that all along, but there was a misuse of single quote marks which stopped it from working before. No one seems to have noticed it until
Clamatius pointed it out - thanks Clamatius!)
Improvements: Updated 8 January 2006 for Firefox 1.5/Greasemonkey 0.6.4
For completists only! If you are working on how to update other Greasemonkey scripts, this is what Kirk/Truckspy did, in case it may help.
The html for the submit button was modified from this:
<input value='Append tags' type='button' onclick='appendTags()'>
To this:
<input id='t-submit' value='Append tags' type='button'>
Why? Apparently you can't add the onclick='function' like normal in Greasemonkey anymore, so that was removed from there and an ID added (needed to access the input to set the onClick below).
And this was added:
var setTsubmit = document.getElementById('t-submit');
setTsubmit.addEventListener('click', appendTags, true);
So apparently this is the format to add an "event" (onclick, onmousedown, whatever) to a Greasemonkey script now.
After that this needed to be changed also:
appendTags = function(){
To:
function appendTags() {
Technorati Tags: Blog, blogs, blogging, tag, tags, tagging, tag tools, tagging tools, Blogger, Blogger.com, Firefox, addons, blog addons, blogging addons, blog add-ons, blogging add-ons, Technorati, Technoratitags, Technorati tags, Greasemonkey, Greasemonkey scripts, Magical Sheep, phydeaux3, Improbulus, A Consuming Experience, Consuming Experience
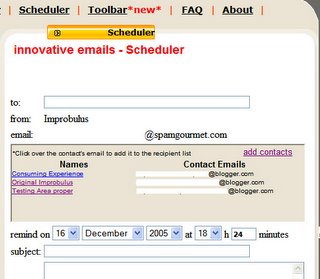


 icon against the relevant feed name under the "Action" column to get to that page). There's now a section that looks like this:


